

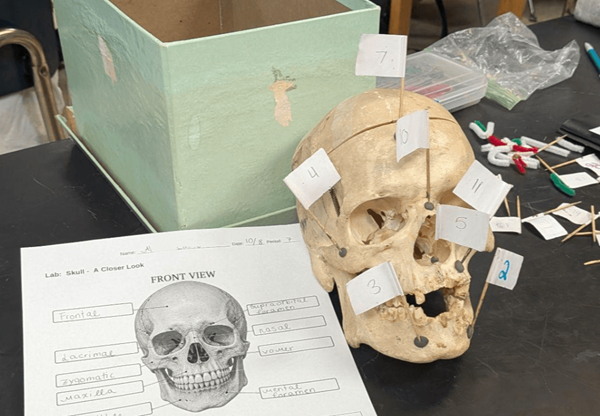
Learning the bones of the skull can be challenging for anatomy students. Many of the bones are difficult to visualize when students only see them in a textbook or on a diagram. Skull: A Closer Look is a hands-on activity that moves students from identifying structures on an image to locating those same structures on an actual skull.
Students begin by labeling anterior and lateral views of the human skull. The worksheet includes a word bank with major bones and landmarks, including the frontal, parietal, temporal, occipital, zygomatic, maxilla, mandible, nasal, lacrimal, vomer, and sphenoid bones. Students also identify landmarks such as the mastoid process and several foramina.
Labeling a Real Skull
The next part of the activity focuses on students working with an actual skull or skull model. I have several real skulls in my classroom, and I have plastic models. Each group gets their own skull and works together to identify structures. They use Post-it notes, tags, chalk markers, clay, or other removable materials to physically label the structures.
This simple change makes skull anatomy much more interactive. Students have to rotate the skull, look underneath it, examine the eye sockets, and decide exactly where one bone ends and another begins. Structures that seem obvious in a flat diagram can be surprisingly challenging to locate on a three-dimensional specimen. Once the structures are labeled, I check each group with a mini quiz. Basically, I ask them to show me a specific structure, like the mandible. I then initial their lab sheet (or use a stamp!)
Taking Skull Measurements
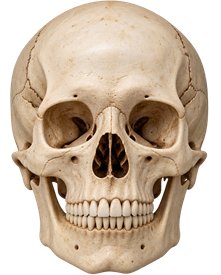
Once students are comfortable identifying the structures, they investigate some of the skull’s anatomical features more closely.
For example, students locate the foramen magnum, the large opening at the base of the skull through which the spinal cord passes, and measure its diameter in millimeters. They also locate and measure the external auditory meatus, the opening in the temporal bone associated with the ear canal. This gives students extra practice with measurements and encourages them to take a closer look at the structures. Students can then compare their skulls to other skulls in the room, which can lead to a discussion about variation in human anatomy.
Finally, students determine if their skull came from a male or a female by examining specific features, like the mastoid process and the shape of the eye socket. This part may be difficult with plastic skulls which may not differentiate between male and female skulls. This is also a good place to have a discussion about real skulls versus plastic skull models.
Related Resources
The Skeletal System Unit Guide – includes all of my resources for teaching the skeletal unit
The Mystery of the Bones – a simulation where students reconstruct (paper) skeletons and learn how skeleton features are used to identify victims
Understanding Knee Anatomy – color the ligaments of the the knee to understand how the joint works
Label the Joints of the Skeleton – explore the different types of joints with this simple labeling exercise
Coloring the Human Skeleton – students use their notes or other resources to identify bones and color a skeleton
Human Skull Model – available at Amazon or biological supply companies.