Advanced Microscope Lab - Using the Microscope and Slide Preparation
[ Google Doc - newer version that is easy to edit ]
 1. Magnification
A. The magnification written on the ocular lens (eyepiece) is _____________
B. The magnification on the:
Scanning objective _______
Low Power Objective _______
High Power Objective _______
C. What is the total magnification for each lens? (multiply scanning x the objective)
Scanning
_______________
Low Power ______________
High Power ______________
2. Diaphragm
Examine the diaphragm, determine how to change the amount of light that passes through your viewing field. Diaphragms on microscopes can be different depending on the model. Describe how your diaphragm works.
3. Viewing the E Slide
Step 1: Focus the slide "e" slide first with the scanning objective.
Step 2:
Click
to lower power and focus again, recenter your specimen.
Step 3:
Finally, focus the slide under high power. At high power, you should ONLY use the fine adjustment knob to bring your specimen back into focus. You may also need to recenter.
Draw the E exactly as it appears in your viewing field for each magnification. The circles below represent your viewing field. The E should take up as much space in the drawing as it does in your viewing field while you're looking at it.
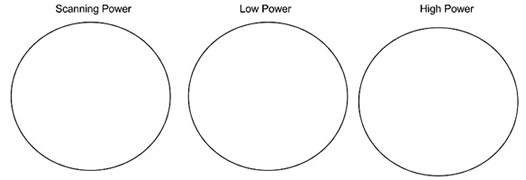
Does the lens of the microscope reverse the image? _________
Does it flip the image? (upside down) _________
4. Making a Wet Mount of a Slide
A.
Gather a few strands of cotton from a cotton ball using forceps.
B.
Place ONE drop of water directly over the specimen.
D.
Place the coverslip at about a 45 degree angle with one edge touching
the water drop and then gently let go. Performed correctly the coverslip will
perfectly fall over the specimen and will not have air bubbles.
Draw the specimen as it appears in your viewing field under scanning, low and high power.
5. Staining a Specimen
A. Tear a small corner from a piece of paper (or this page). Make a wet mount as you did with the cotton. And check to make sure you can see your scrap under the microscope.
Biologists learn to stain specimens that have already been created. You will not remake this slide, but use a procedure to draw a stain under the coverslip using the capillary action of water.
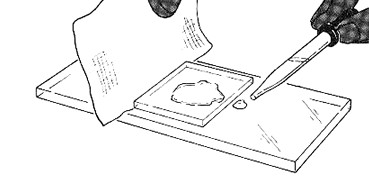
B. Place one drop of stain (methylene blue or iodine) on the edge of the coverslip you made with the paper.
C.
Place the flat edge of a piece of paper towel on the opposite side of the coverslip.
The paper towel will draw the water out from under the coverslip, and the cohesion
of water will draw the stain under the slide.
D. Draw your specimen and use colored pencils to show how the stain appears. It may appear darker or lighter in spots. Use shading to show darker and lighter spots.
6. Investigation of Pond Water & Microorganisms
A. Prepare a wet mount of pond water - a sample of pond water is provided in a jar. The best specimens usually come from the bottom and probably will contain chunks of algae or other debris.
B. Use the microscope to focus on the slide - try different objectives, some may be better than others for viewing the slide. Adjusting the diaphragm may also help see small swimming organisms in the water.
C. Obtain preserved slides of various microorganisms and specimens. This is your chance to explore any of the slides or specimens available to you in the label.
Draw your specimens and label with the NAME of the specimen and the MAGNIFICATION
7. Cheek Cell Smear
A. Place a drop of methylene blue on a slide.
B. Scrape the inside of your cheek with a toothpick and then swirl this sample into the droplet of methylene blue. Caution: methylene blue can stain skin and clothes.
C. Place a cover slip on the droplet. These cells will appear as light blue blobs with dark spots in the center, the nucleus and will be small at a 40x magnification
D. Draw your cells (at 400x). With a steady hand, you can even take a photo of these cells with your cell phone, a "cell-fie!"
8. Plant Cell
A. Obtain a leaf of a water plant or an onion cell slide.
B. Sketch the cells as you see them under HIGH Power
Compare the shape of the animal cells from your cheek to the shape of a plant cells.
9. Investigation of Large Specimen
Light microscopes are only useful for viewing small thin specimens. Stereoscopes present a larger field of viewing and handle depth much better than the light microscope. The drawback of the stereoscope is that it does not have a high magnification. Examine one of the stereoscopes in the room. They will be positioned around the room with specimens..
Name/Description of specimen(s) viewed: __________________________
What is the magnification(s) of the stereoscope? _____________________
Can you change the type of light? __________
10. Measuring with a Microscope
A. Use a ruler to determine the width of the viewing field under the scanning objective. Position the ruler so that the millimeter marks are visible in your viewing field. Remember that there are 1000 micrometers in a millimeter.
B. Estimate the length (diameter) of your viewing field in micrometers: scanning _______ low power ________
You cannot use this method to determine the diameter under high power (try switching objectives, you won't be able to even see the ruler). Instead you can use a mathematical proportion method to determine the diameter under high power. Show your work below with your estimate of the length (in micrometers) of your high power field of view.
![]()
High Power Field of View = _________
C. Sketch a paramecium and a cork slide, drawing each to scale with attention to detail.
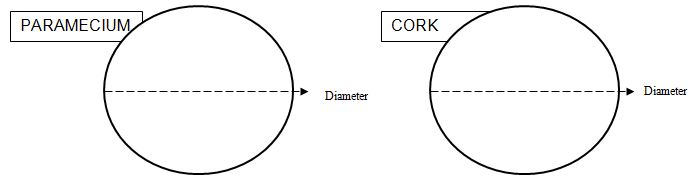
Length of paramecium = ____________ Length & Width of Cork = ____________